Showing posts with label demolition. Show all posts

Tuesday, November 8, 2011

Kiss the kitchen goodbye!

So I got home after work today to find that our entire kitchen has finally been demolished!

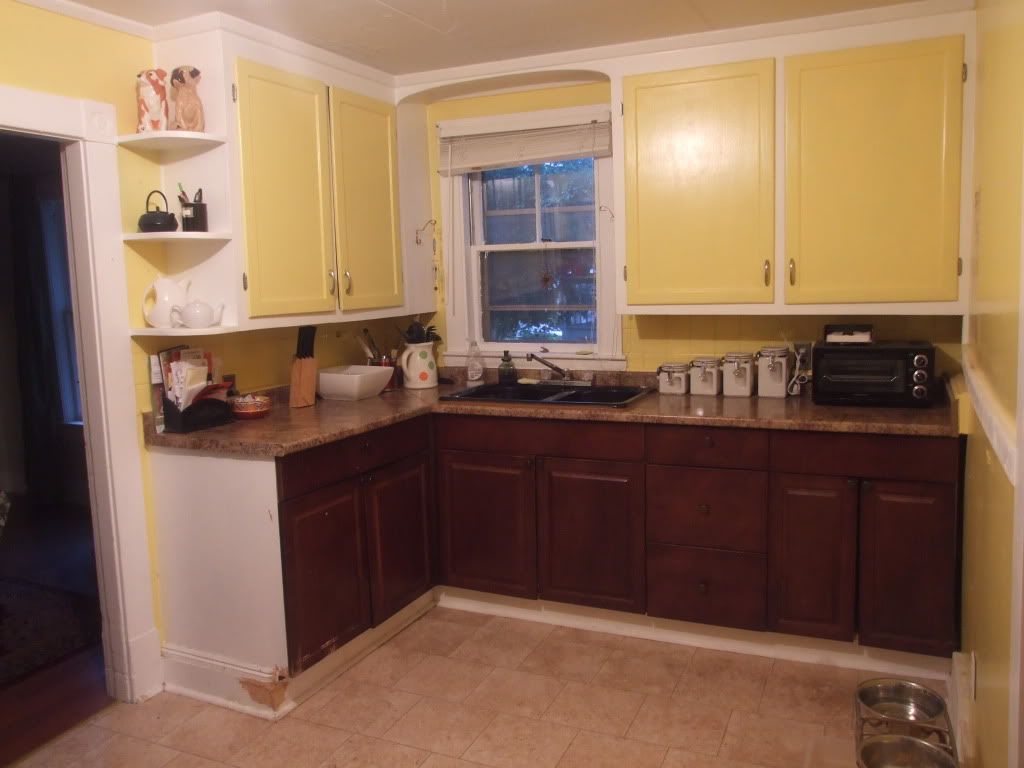
You'll remember that back when I explained our plans for renovating the kitchen (which later turned into a much larger renovation with construction of a new addition), the kitchen looked like this:
Welp, the kitchen is now stripped to bare bones and looking like this:
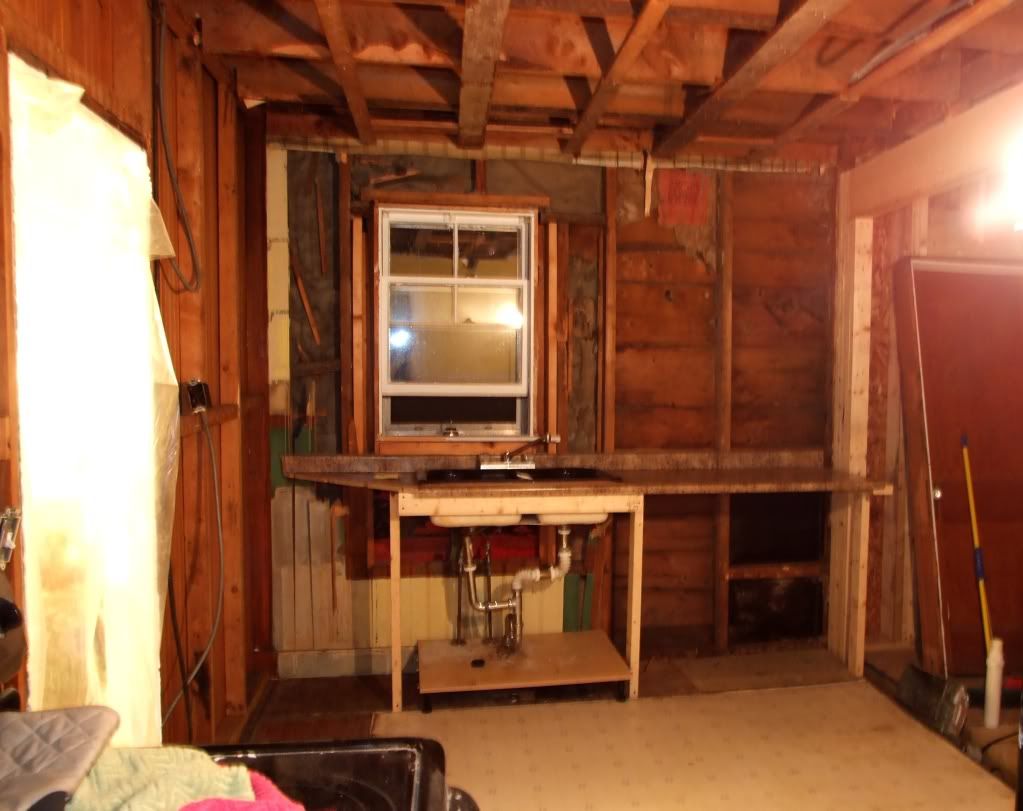

All of the cabinets were ripped out today, as well as the majority of the countertops. The big opening on the right is the new 3/4 bathroom in the addition. There will be a wall built there between the kitchen and bathroom, and the new kitchen cabinets will eventually continue across that wall.
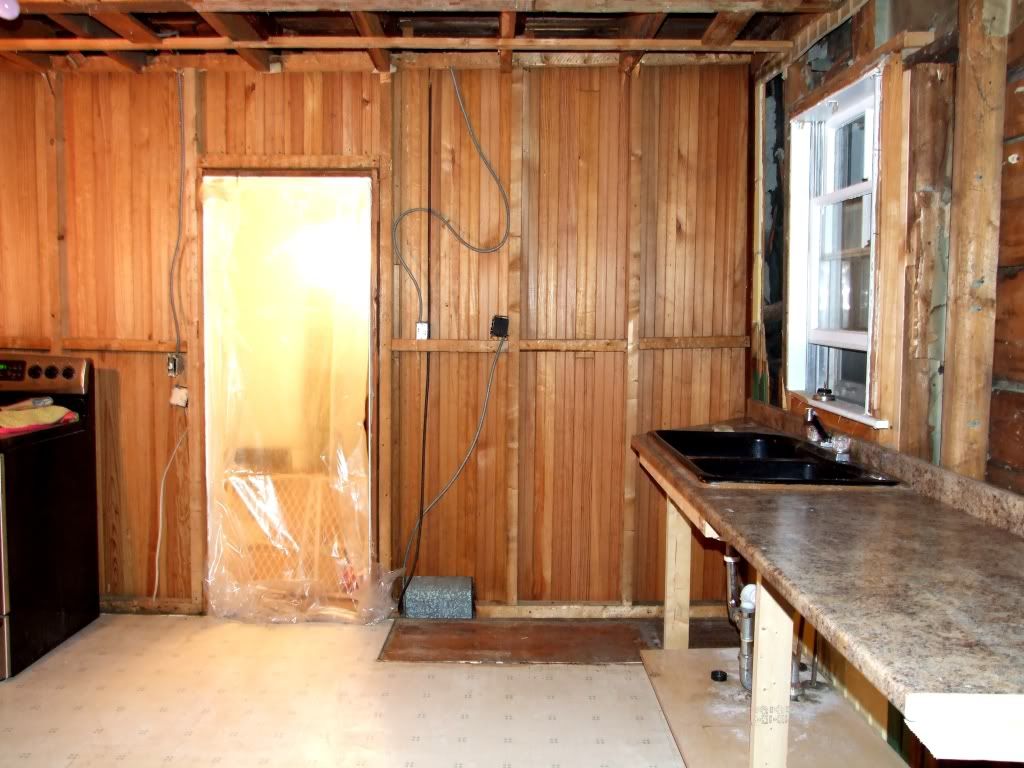
The drywall was removed, revealing more of the solid wood beadboard that we encountered in the rest of the downstairs when we renovated last summer. The crew dropped the ceiling and pulled up most of the laminate floors. Underneath was a layer of white linoleum, and underneath that is hardwood flooring (which you can see in the corner above). Unfortunately the wood flooring in the downstairs doesn't look to be in good enough shape to refinish, so we'll likely still be sticking with our plan to put down tile in the kitchen, new mudroom, and new bathroom (plus also installing new hardwood floors in the living room addition, current living room, and dining room).
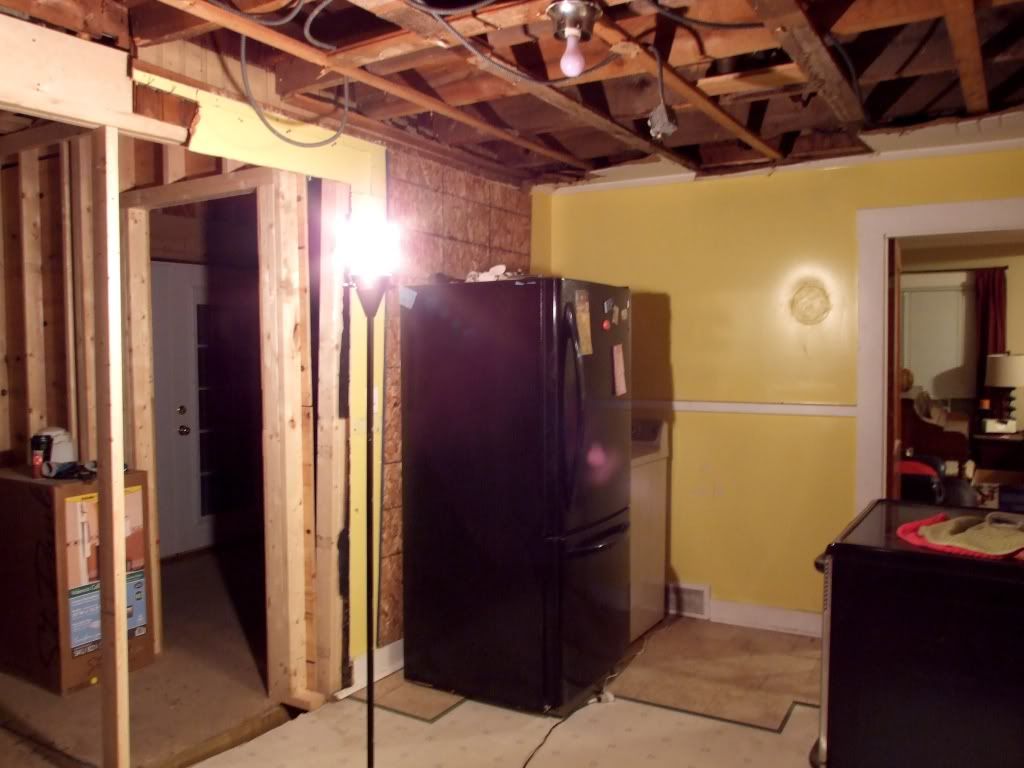
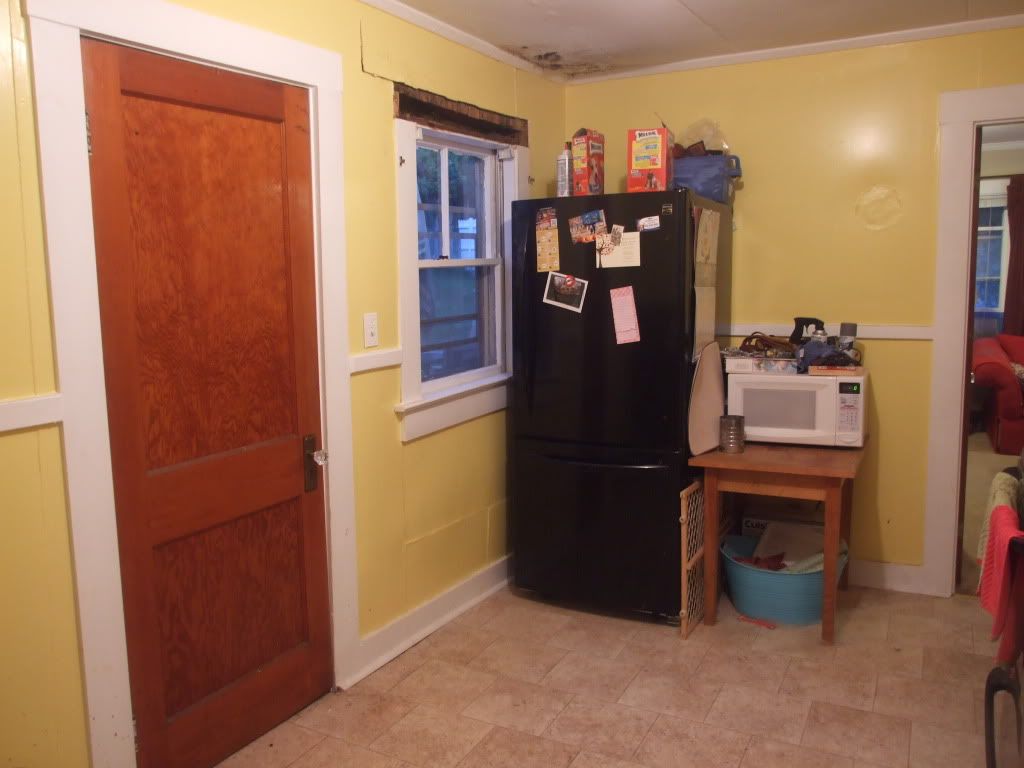
The wall behind the fridge (where there is currently a sheet of plywood) will be an opening into the mudroom (you can see the new patio doors in the background there). This corner used to have a window and door:
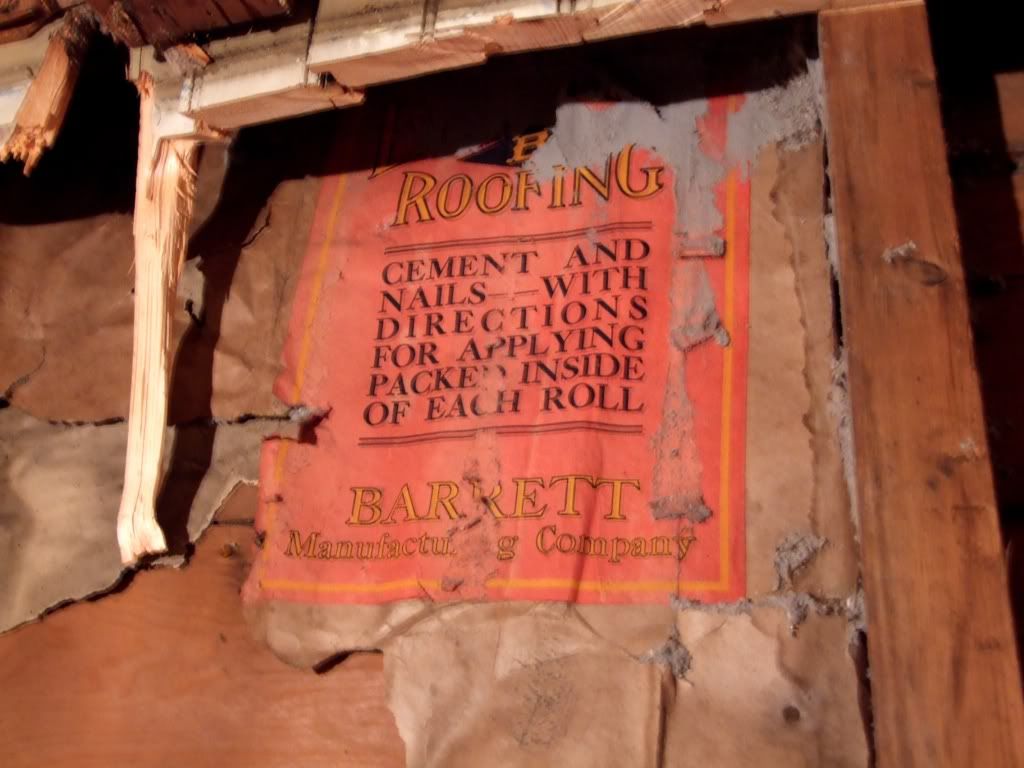
Much like the newspaper pages we found inside the walls in the rest of the downstairs when we demolished last year, the kitchen had some interesting artifacts beneath the drywall, like this old roofing material label:
Here is another view of the newly opened up kitchen:
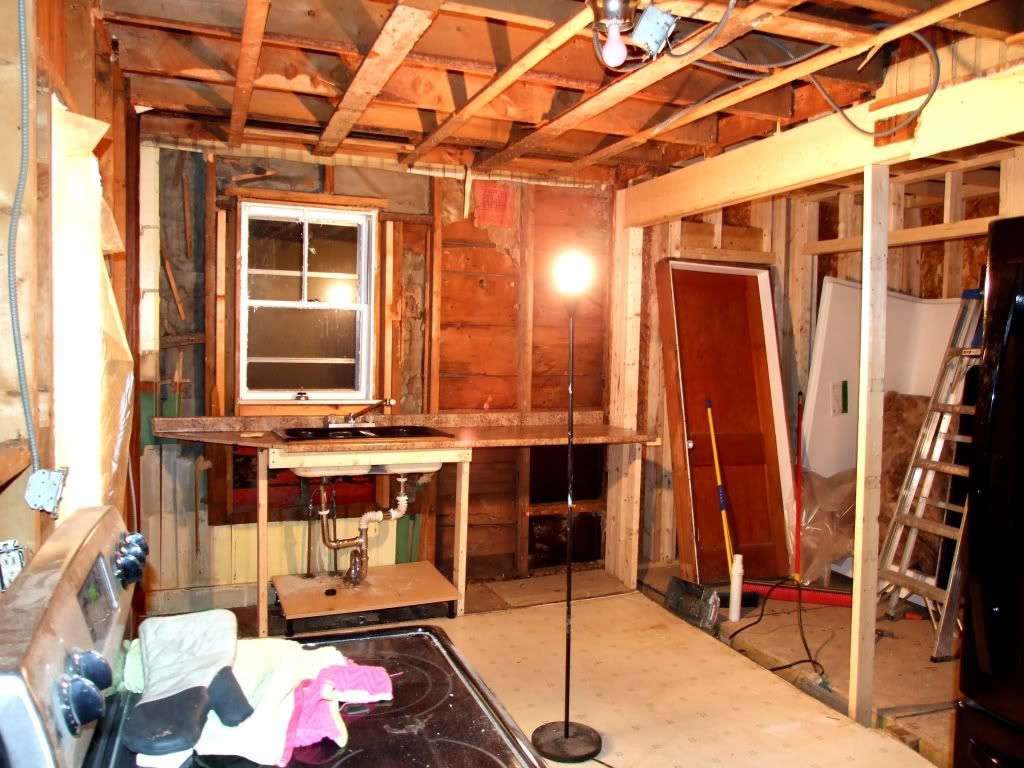
Such a disaster!

I do feel like this is a step towards some major progress, though, so I'm excited! Hopefully we'll have the back wall in the living room taken down soon too, so we can really get an idea of how the new addition will blend with the rest of the house. In the meantime, we certainly won't be cooking any meals in here...

Sunday, August 14, 2011

It's happening!!!

Huge news!
The time has come for us to officially move forward with our huge kitchen renovation project!! Things are moving quickly, and our contractor begins work next Monday!

We decided to officially move forward with option number two, which I had discussed here, and are adding a half bathroom to a section of the current kitchen. We felt like this was the best move not only for convenience, but also because it will add big value back into the house. A one-bathroom, 3-bedroom house just doesn't cut it these days, after all!

So here's where we're at:
In the last couple of weeks, we got bids from three contractors and chose one to move forward with. We liked this contractor the most and his bid just happened to be about $10,000 lower than the others. Lucky! What will be a bit different about this job is that it will be two phases. The first phase will involve demolishing the mudroom off of the kitchen, building a new addition in its place, new windows, lighting, and building the half bathroom. The second phase will be installing the cabinets, countertops, hardwood floors (both in the kitchen and dining room), and finish details.

However, before any of that stuff can be done we need to demolish the entire kitchen.

Like, right off the bat. We had thought that we'd be able to keep at least some of the kitchen functioning (like our stove plugged in or some cabinets) while the addition was built, but nope. In order for the electrical to be brought up to code (with an outlet every 3 feet) every single thing in here must go from the very beginning. So, it looks like we'll be completely without a kitchen for a while. A long while.

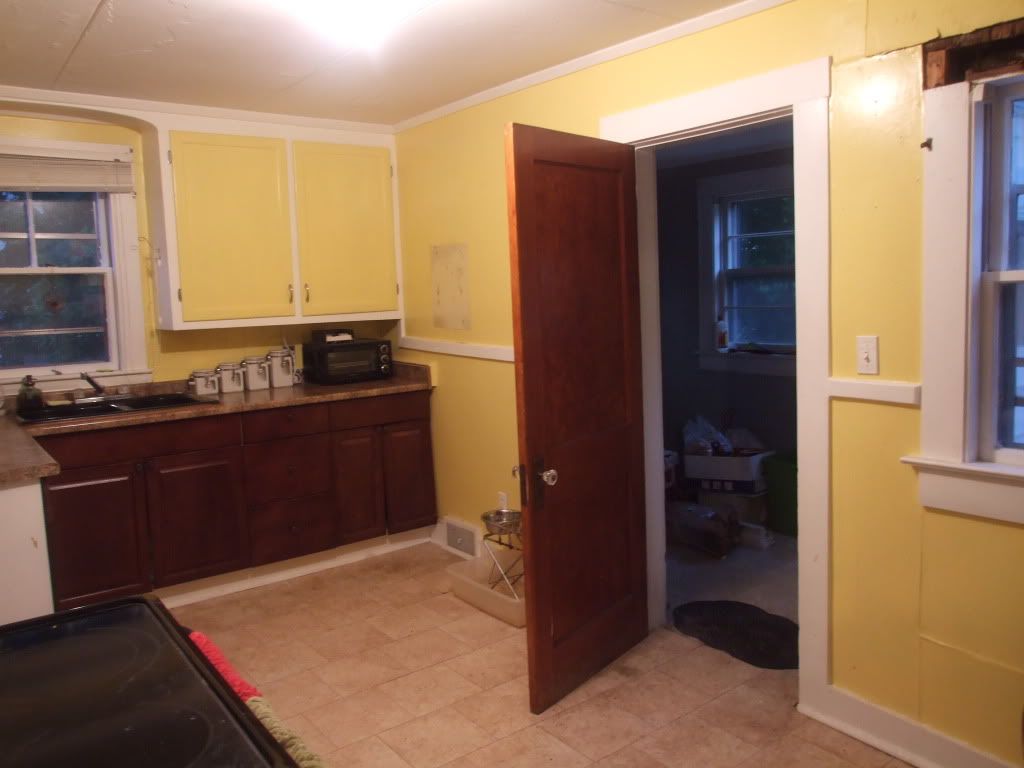
Here is one half of the (horrible, unusable, hideous, blindingly yellow, etc.) kitchen as it stands:


I don't think I need to go into detail about why we're doing this renovation! The kitchen is completely unusable in its current configuration. On the opposite end of the kitchen is the fridge, and the stove sits between two doorways to the left of this photo.

To the right is a wall between the kitchen and mudroom. (For a visual reference, check out the current floor plan here.)


This entire wall is coming down. The mudroom is also being demolished (it leaks in places and was never properly insulated). An 11' x 8' addition is going up in its place so the kitchen will be expanded. We'll put in all new windows and an exterior door to the patio.

The corner to the right of the current mudroom door, where our fridge currently sits, will become the new half bathroom.


Oh, and those holes in the ceiling and window frame? Carpenter ants. We had an exterminator in and found that they had eaten away the whole window frame. Bastards! This whole window is coming out and a smaller one is going in its place to allow for some privacy in the loo.

The area where the stove currently is will essentially be a hallway to the living room. The bathroom door will be on the left, across from the existing basement door on the right.


I'm so excited to get rid of the last of these crazy paneled ceilings! I can't believe that these used to be throughout the entire house. Awful.


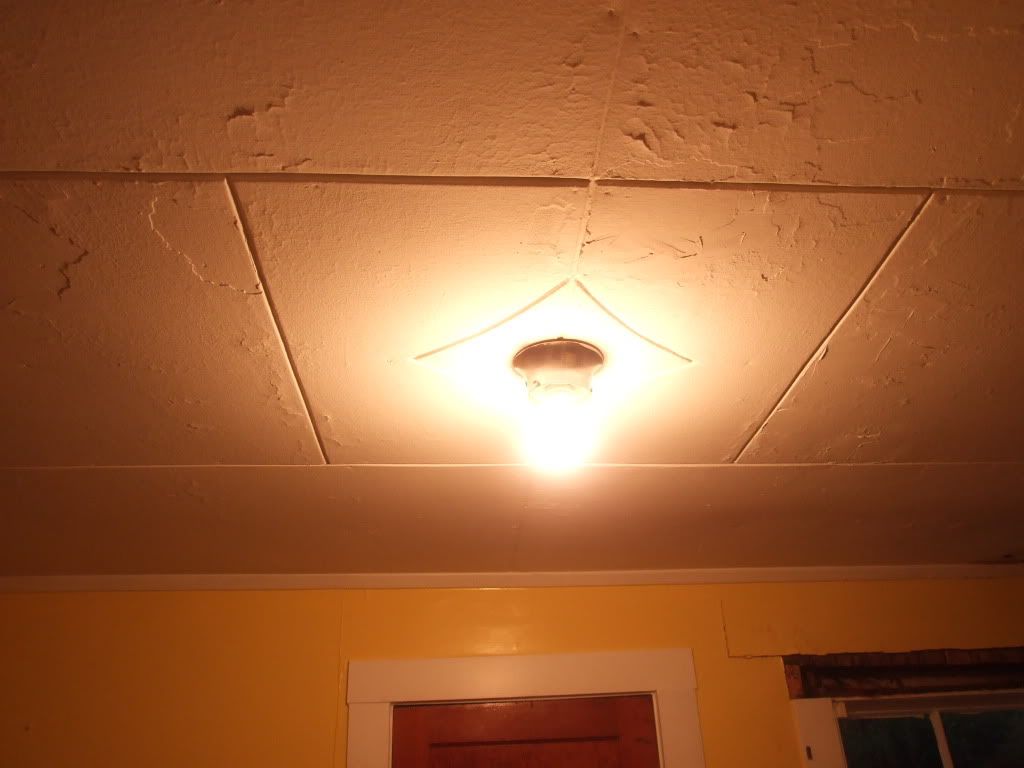
Lighting is also going to be a huge upgrade in the kitchen. Currently, the only light in the whole room is this one exposed bulb in the ceiling. It's kiiiind of like a crack den.

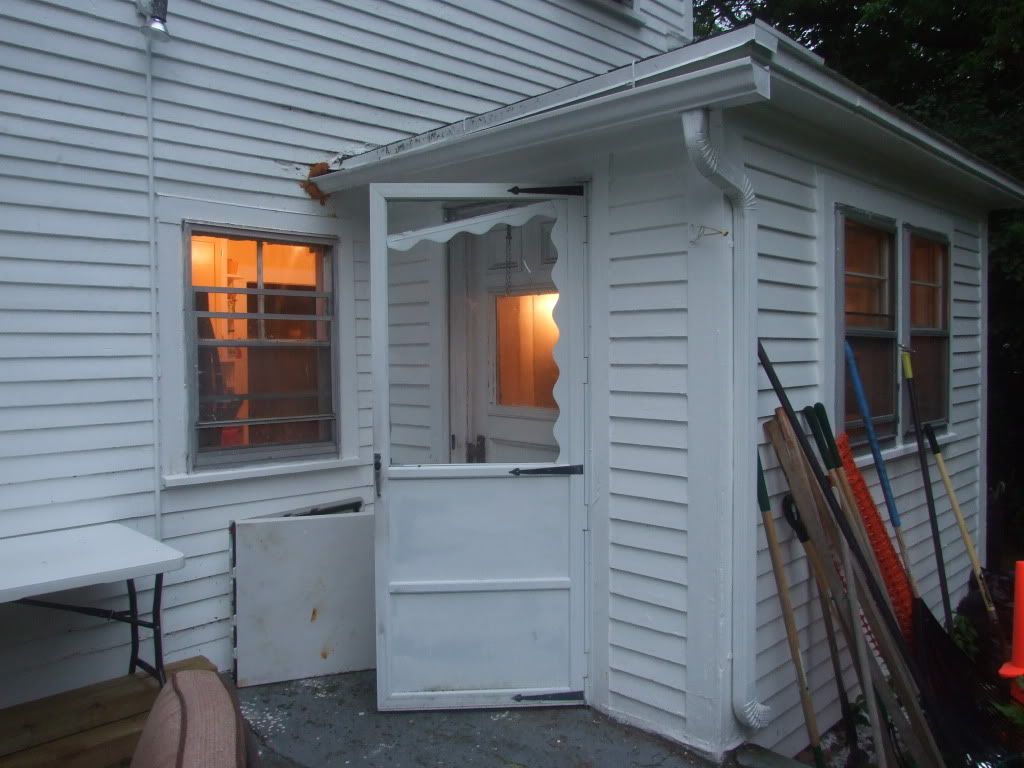
Here's an exterior view of the existing mudroom that will be taken completely down, with a slightly larger addition built in its place:


We plan on adding a glass door to let lots of light in.

So, that's where we're at. It's going to be an incredibly chaotic next couple of months! We picked up some storage bins so we can start packing all of our dishes, pots, pans, and pantry stuff in the next couple of days. We plan on plugging the fridge in the dining room, the stove will be shoved someplace collecting dust, and it will be general chaos. It's an enormous project, but it's going to be so worth it in the end!

Welcome to Lucy's House, where things get kinda crazy.

Sunday, October 24, 2010

Bathroom renovation update!

Here we are at the start of day three of our four-day bathroom renovation. We've gotten a ton accomplished in the last two days! I'm confident that we'll be able to get all of the major stuff finished before Tuesday.

First thing we did was drop the ceiling. Then we started pulling down the tiles in the shower.

Photobucket

All was going well until we discovered this:

Photobucket

Black mold, awesome! This is the spot where the tiles had started falling off previously, so I wasn't surprised to see that we had some moisture there.

So we changed plans a bit and pulled down the drywall around the entire shower. We figured we might as well take it down to the studs and replace everything--even the spots that aren't currently damaged--to be sure that it doesn't happen again.

Photobucket

Photobucket

After bleaching the crap out of everything we put up a vapor barrier across the ceiling and down the walls. This helps prevent further moisture.

Photobucket

Then Branden and our bff Josh hung the drywall (the purple board underneath in the picture... didn't have time to take a pic of just this step, sorry!) on the ceiling and walls, taping and mudding along the seams. This particular drywall is mold and mildew resistant, so ideal for bathrooms.
Photobucket

After that we put up a cement backerboard, which is used to prevent mildew and also to help tiles adhere.
Photobucket

Last but not least, we put up the tiles!

Neither of us had ever tiled before, but it was really simple. It took a couple of minutes to figure out exactly how much thinset to use on the wall, but once we got that down, we were able to zip right through.

So the entire shower is finished now and that's where we're at! All that's left now is to do another coat of mud on the ceiling, grout the tile, put up trim, and paint!

I hope to have the full reveal in just a couple of days! Until then, here's a sneak peek of the shower tile:

Photobucket

Friday, October 22, 2010

It's bathroom demolition time!!

As I speak type Branden is in our bathroom ripping down the ceiling. See, late last night he decided that since we both have the next four days off, this would be a good time to renovate the bathroom. The bathroom has been on my list of dream projects for a while, so naturally I thought this was a fantastic idea. That settled it, and off to Home Depot we went.

Our upstairs bathroom (the only one in the house) is a major eyesore, and we haven't touched it since we bought the house in June because we knew it needed a total overhaul. And, frankly, we had bigger fish to fry.

Here's the unsightly mess that we've been living with for the last 4 1/2 months:

Photobucket

Nasty. I know.

The walls are painted a bright as the center of the sun yellow, and it's some kind of super stretchy latex paint. You can actually just pull it off with your fingers and it feels like a balloon. I've never seen anything like it. (Our kitchen features the same lovely paint job, btw.) We started pulling it off in some places, and you can see that equally lovely mauve paint underneath. Barf.

On top of the beauuutiful paint job, the beadboard was never completely primed or painted. You can see where the previous owners stopped priming to the right of the toilet. Awesome.

So, here is the renovation agenda for the next four days.

First, rip down the ceiling panels.

Photobucket

These panels were originally throughout the entire house, and we already got rid of them everywhere except the kitchen and bathroom, since we knew we'd be doing bigger renovations in those rooms. We'll be replacing the ceiling with mold and mildew resistant sheet rock.

We'll also demo the equally barf-inducing robin's egg blue tile in the shower.

Photobucket

See how the tiles have already started falling off? Hopefully the demolition is a breeze. We already picked up some beautiful glass mosiac tile for the shower. We plan on bringing the tile all the way up to the ceiling for a more polished look. Neither of us have tiled before, so this will be a new adventure!

After the tiles are up (successfully, I hope!), we'll strip the latex paint off these walls and repaint.

Photobucket


So what do you think? Can we get this done in four days?? We'll find out!

Friday, June 11, 2010

On the menu for this weekend: more demolition!

Our house is on a quarter-acre lot. Most of the yard space is on the front and right side of the house. Along with lots of storage space in the basement, there is also a detached garage and a gigantic shed in the back. The shed is about double the size of the average shed but curiously only has a single door, not the double barn doors that could accommodate a lawn mower or other equipment.

We have no idea what this could have been built for. Given the patch-it-instead-of-fix-it-right-the-first-time technique found throughout the house, I highly doubt it was a workshop. I don't get the impression that anyone handy lived here. Ever. Perhaps a chicken coop? Studio? Place to stash the dead bodies? Evil scientist's lair?

Here's the shed in question:
DSCF2747
See how huge it is compared to Branden? There's no need, people.

DSCF2753
DSCF2751


H-U-G-E. It takes up a massive chunk of the backyard. And that is yard space that a certain jumbo pooch would love to have to frolick in, eat sticks, and poop on.
Enter the rented dumpster:
001

Since we've got that bad boy just until the middle of next week, we figured we should fill 'er up. The plan is to cut into the shed and rip it all down on Sunday (with help!). I will probably be hanging out with the pup, maybe sanding and painting that cruddy picnic table and benches you can see in second picture of the shed. Or weeding and trimming hedges. Or daydreaming. What I mean to say is, I'll be finding other ways to be helpful while completely avoiding taking down a large-ish structure with sledgehammers and saws or carting the rusty nail-encrusted pieces to the dumpster. Since I find new ways to accidentally hurt myself every day, this project is a trip to the ER just waiting to happen for me. No thanks!

Here it is from the front of the house, looking up the side of the yard:
DSCF2782

That will be just green space once the shed is down. I can't wait to see how much it will open up the yard when it's gone. Fingers crossed for no major (or minor) injuries!