
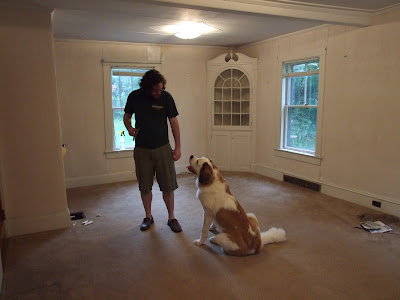
Here is the living room (and the big pup!) before we started working:

And here is the living room after about 10 to 15 hours of stripping back SEVEN layers of wallpaper:


It looks like a war zone. Remember those horrible, heart-wrenching photos of the insides of destroyed houses in New Orleans after Hurricane Katrina? Yup. That's what our house looks like to me.
Stripping 100 years of wallpaper (many layers of which have been adhered with actual glue that doesn't come off with those removal chemicals) is not an easy feat, as you can probably imagine. We have learned some tricks, though, that have made it a teeeeny bit easier. Allow me to share, should anyone reading this ever find themselves in the same horrible situation:
1. Get a wallpaper steamer.
We started by renting one at Taylor Rental for $28 a day. We weren't sure if it would be worth it or not, so we figured we'd rent one first and try it out. It definitely helps, and the steam penetrates most of the layers to allow for scraping. We decided to buy our own, for just under $100 at Lowes, since EVERY SINGLE ROOM in our house has 100 years of wallpaper to remove, and spending nearly 30 bucks a day just didn't make economical sense.
The steamer we got was the Wagner 905 Power Steamer. It's the little yellow vacuum-looking thingy in the second picture above. It doesn't hold as much water as the one we rented, but it still does the job.
2. Vinegar actually works.
Spraying a mixture of water and vinegar on the walls has been the most effective "chemical" treatment we've found so far. We tried DIP, that didn't work. The vinegar does smell strong, so you'll want to keep windows open. Also, if you have a dog that's anything like Lucy and will eat everything in sight, you should keep them away. Lucy licked the vinegar off the walls. Gross. Use a wallpaper scorer to puncture the paper (it likely won't penetrate all 60 million layers of paper that seem to be on your wall, but it will get through the first few) and spray the vinegar mix. Let it sit for a minute, then hit it with the steamer. Scrape the layers off with the putty knife.
If you're as lucky as we are, right about now in the process you'll discover that underneath layer #3, there is a thin layer of plaster from when some previous owner decided to plaster over the walls and then apply more wallpaper in an effort to patch problem areas. This will enrage you but it is important to not burn your new house down just yet. Instead, pick away at the plaster layer with your putty knife, and keep scraping.
Once all the paper is off completely (at this rate, we have no idea when that will be) we'll need to skim coat the entire walls, floor to ceiling, with a thin layer of plaster. There are a ton of cracks, crevices, and other imperfections in the drywall from being so old. We'll need to skim coat the walls to smooth them out (at least one coat, maybe two), sand the plaster down, and then prime and paint.
Our goal is to have the living room primed by the time we move in next Sunday. I honestly don't see how it's going to happen. We'll be there all day tomorrow (our brand new appliances are being delivered tomorrow morning!!) so hopefully we can bust out a ton of this shit and get closer to it looking like a real room and not a disaster area!
The amount of (seemingly) endless work ahead of us is kind of a depressing thought, sooo I'm going to end this post on a happier note:

No comments:
Post a Comment
Share your thoughts here!